A Modern Guide to Business Letter Format in Word: Tips for Polished Letters
Think you’ve got the business letter format in Word down? You might know the basics: set one-inch margins, pick a classic font like Times New Roman at size 12, and left-align everything. That’s the Block Format in a nutshell.
Mastering this simple layout gives your document a clean, professional look that makes a solid impression before a single word is even read. It's a practical skill for any professional, student, or content creator.
Why a Professional Letter Format Still Matters
In an age of quick emails and instant messages, it's easy to dismiss the formal business letter as outdated. But a well-formatted letter cuts through the digital noise, signaling a level of seriousness and respect that a casual email just can't match.
Whether you're a content creator crafting a cover letter, a professional sending a formal proposal, or a student submitting an application, getting the format right instantly builds your credibility. It’s a non-verbal cue that shows you pay attention to detail.
The Power of Professional Presentation
This guide will walk you through the essential letter formats, starting with the universally accepted Block Format. We’ll also touch on a few alternatives for those times when a different layout might be more appropriate. Our goal is to give you the confidence to create a letter that ensures your message is taken seriously.
Structure isn't just about looking good; it's about being effective. A 2023 study found that professionally formatted documents are perceived as 34% more credible than poorly formatted ones. This shows how much presentation influences your audience.
Here’s a quick overview of the essential parts of a business letter. We'll break down each one in detail throughout this guide.
Quick Guide to Business Letter Components
| Element | Purpose | Typical Location |
|---|---|---|
| Contact Information | Your name, address, phone, and email. | Top Left (Block) or Top Right (Modified Block) |
| Date | The date the letter is written. | Below your contact information. |
| Recipient's Info | The recipient’s name, title, and address. | Below the date, aligned to the left margin. |
| Salutation | The formal greeting, e.g., "Dear Ms. Smith:". | Below the recipient’s info, followed by a colon. |
| Body | The main content of your letter, single-spaced. | Below the salutation, with a blank line between paragraphs. |
| Closing | A professional closing, e.g., "Sincerely,". | Below the body, aligned with your contact info. |
| Signature | Your handwritten signature (for print) and typed name. | Below the closing, with space for the signature. |
| Enclosures | A note indicating additional documents are included. | Below your typed name. |
As you can see, each element has a specific purpose and place, contributing to a polished final product.
From Screen to Paper
Creating a professional letter doesn't stop once you've typed the last word. The final output, whether it's a PDF or a physical copy, has to be just as clean. If you’re printing it out, ensuring a perfect print every time is that last little step that solidifies your professional image.
Ultimately, an effective business letter boils down to two things:
- Impeccable Formatting: The layout must be clean, consistent, and follow established professional standards.
- Clear, Polished Content: Your writing has to be sharp, concise, and error-free. It should sound authentic and human, not robotic.
Word gives you the tools to get the format right, but making sure your content is equally polished is just as important. That's where we can help, refining your text to match your flawless presentation ethically and authentically.
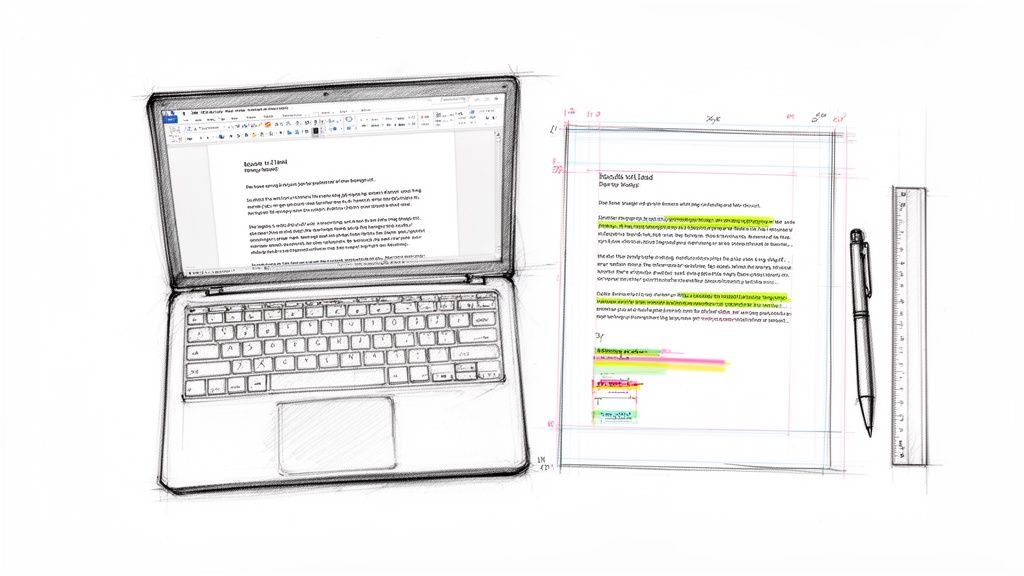
Getting Your Word Document Set Up for Success
Before you type a single word, taking a moment to set up your document correctly is a must. Think of it like dressing for an interview—getting the presentation right makes an immediate, positive impression.
These settings aren't arbitrary; they're long-standing conventions that make your letter look professional and, more importantly, easy to read. A few clicks now will save you a lot of formatting headaches later.
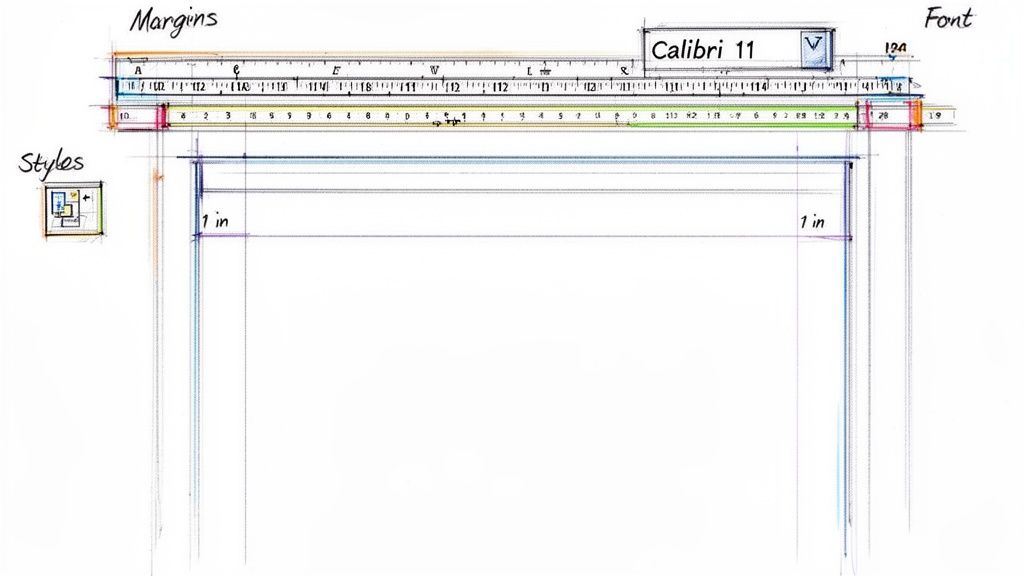
Nail the Margins and Spacing
The gold standard for any business letter is one-inch margins on all four sides. This gives your text a clean, uncluttered frame and prevents it from looking cramped on the page, whether it’s read digitally or on paper.
Thankfully, Microsoft Word makes this simple. Just head over to the Layout tab on the main ribbon. The first button you’ll see is “Margins.” Click it, and select the “Normal” preset—it’s already configured for one inch all around.
Pick a Professional Font
Your font choice says a lot. While a creative font might be great for a personal project, a business letter demands something classic and readable. You want your reader focused on your message, not your font.
You can’t go wrong with these tried-and-true options:
- Times New Roman: The old-school, formal standard. It’s a safe and respected choice.
- Arial: A clean, modern sans-serif font that’s incredibly easy to read on screen.
- Calibri: Word’s default for a reason. It’s professional yet has a slightly softer, more contemporary feel.
For size, stick to a range between 10 and 12 points. We find 12-point to be the sweet spot for readability, but 10-point can work if you’re trying to keep a longer letter to a single page.
Once you’ve picked your font, make sure your line spacing is set to Single (1.0). You’ll add space between paragraphs manually by hitting "Enter" twice, which creates that clean, block-like structure. Perfect formatting is only half the battle; make sure you also master the rules of capitalization and punctuation for a truly professional document.
Nailing the Block Format for Your Letter
When it comes to writing a professional business letter in Word, the Block Format is king. It's the go-to style for most modern correspondence, and for good reason. Its main feature is its simplicity: everything is lined up on the left margin. This creates a clean, organized look that's easy to read and even easier to set up.
Let's walk through building a letter using this format. Imagine you're a content creator reaching out to a potential new vendor to ask about their services—a common scenario that's perfect for showing how all the pieces fit together.
Starting at the Top: Your Info and the Date
Every professional letter needs to start with your contact information. This isn't just a formality; it gives the recipient everything they need to get back to you.
Start by placing your full name, address, phone number, and email at the very top, all aligned to the left. Give each piece of info its own line to keep things neat.
Once your contact details are in, hit "Enter" twice to leave a single blank line. Then, type out the full date, like "October 26, 2023". That bit of white space is a small detail that makes a big difference.
Addressing the Recipient
Next up is the recipient's information, what's known as the "inside address." Leave another blank line after the date, then type the person's full name and professional title, followed by the company name and its full address. Just like your contact block, each part gets its own line.
Putting it all together, the top of your letter should look something like this real-world example:
Your Name
123 Content Lane
Anytown, USA 12345
(123) 456-7890
[email protected]October 26, 2023
Ms. Jane Doe
Marketing Director
Creative Solutions Inc.
456 Business Blvd
Sometown, USA 54321
This structure is crystal clear and sets a professional tone from the get-go.
The Salutation and Body
After you’ve added the recipient's address, leave one more blank line before writing your salutation. A classic "Dear Ms. Doe:" is almost always the right move. If you're ever stuck, our guide on the best email salutations has great tips that are just as useful for letters.
Now for the main event: the body of your letter. Keep your paragraphs single-spaced, but—and this is key for the Block Format—always leave a blank line between each paragraph. This is a non-negotiable rule that makes your letter much more readable.
The writing here should be as sharp as the formatting. This is a great place to ethically use a tool like PureWrite. You can get your main ideas down, and we'll help you polish the wording so it sounds professional, clear, and authentically human—not like it was generated by a generic AI. For a different take on formal letters, this excellent guide to creating a formal letter template provides more solid examples.
The Closing and Signature
When your message is complete, it's time to wrap things up. Leave a blank line after your last paragraph, then type a professional closing like "Sincerely," or "Respectfully," followed by a comma.
Finally, hit "Enter" a few times to leave three or four blank lines. This empty space is where you'll physically sign your name on a printed letter. Below this gap, type your full name. If you're sending any attachments, you can add an "Enclosure" line right under your typed name.
When to Use Modified Block and Semi-Block Formats
While the full Block Format is the go-to for its clean, modern simplicity, having a couple of other options gives you valuable flexibility. Knowing when to swap in the Modified Block or Semi-Block formats lets you subtly shift the tone of your letter for a specific reader or situation.
It’s a bit like choosing an outfit. A modern suit is perfect for most business meetings, but sometimes a more classic look feels more appropriate. These formats work the same way, adding a different flavor to your letters without ever looking unprofessional.
Choosing the Modified Block Format
The Modified Block format is the most popular alternative to the standard block style. The main difference is simple: your contact information, the date, and your closing are all pushed over to the right side of the page or tabbed to the center point.
Everything else—the recipient's address and all the body paragraphs—stays aligned to the left margin, just like in the block format.
This layout strikes a great balance between formal and personal. It feels a touch less stark than the full block format, which makes it a fantastic choice for situations like:
- Writing thank-you notes where a bit of warmth is key.
- Sending personal business letters to a colleague you know well.
- Crafting networking follow-ups where you want to build a personal connection.
It's a small change, but shifting those key elements to the right breaks up the rigid vertical line of text, giving the page a more classic, balanced feel.
The infographic below shows the basic building blocks of any professional letter. You can see how the header, body, and closing are distinct sections, and it’s the alignment of these parts that changes between formats.
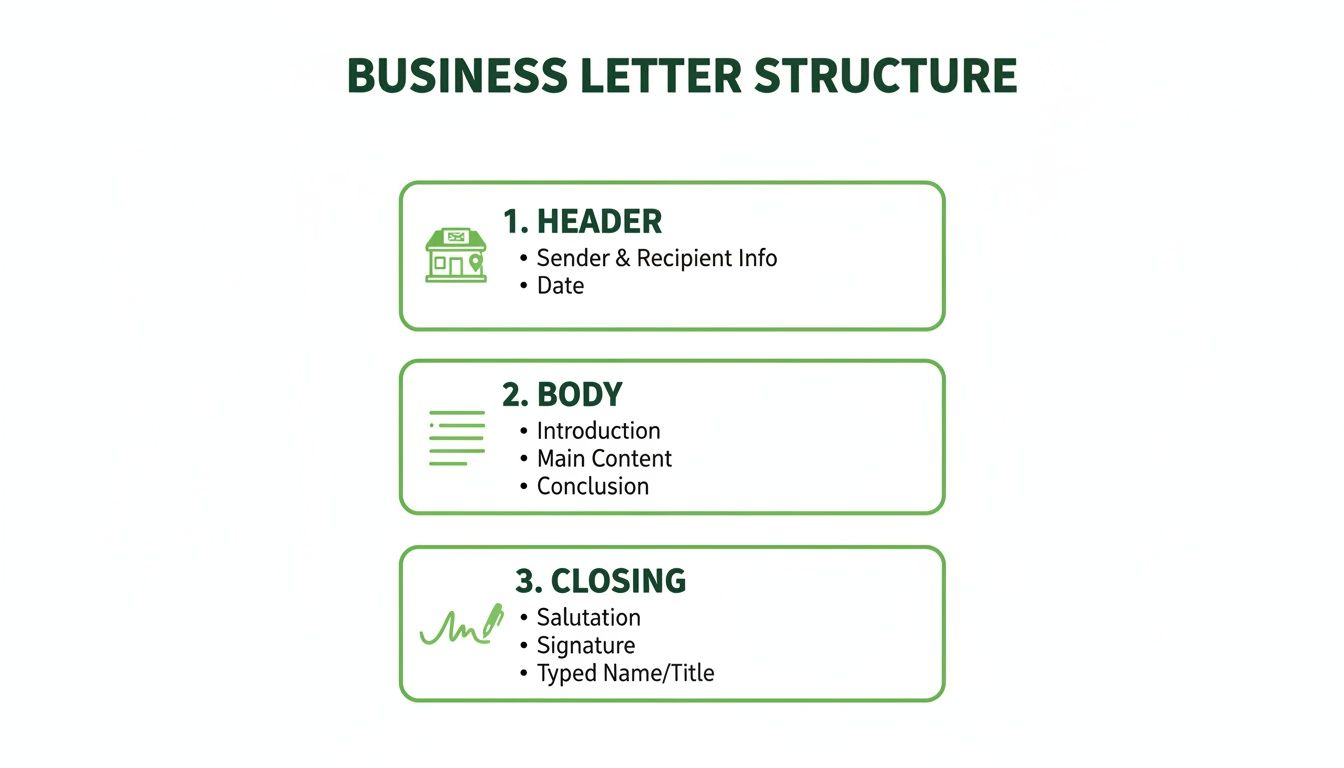
No matter which layout you pick, getting these core components right is what makes your letter look polished and professional.
When to Consider the Semi-Block Format
The Semi-Block format is the most traditional of the bunch, and you won’t see it used very often these days. It takes the Modified Block layout (with the date and closing on the right) and adds one more old-school touch: the first line of every paragraph is indented.
This style is a clear throwback to the typewriter era. Because of its very formal, almost dated vibe, its use cases today are pretty niche.
You might pull out the Semi-Block format if you're writing to someone in a highly traditional field like law, academia, or certain government agencies. It communicates a deep respect for tradition and formality.
For almost all other business communication, though, it can come across as a bit stiff. The most important thing is to know your audience. Good etiquette is always central to professional writing, a principle we cover more in our guide to workplace email etiquette.
Comparing Business Letter Formats
To make it even clearer, here’s a quick breakdown of the three formats. This table should help you decide at a glance which style is the best fit for your next letter.
| Feature | Block Format | Modified Block Format | Semi-Block Format |
|---|---|---|---|
| Overall Feel | Modern, clean, and efficient | Traditional yet balanced | Very formal and classic |
| Sender's Info & Date | Left-aligned | Right-aligned or centered | Right-aligned or centered |
| Recipient's Address | Left-aligned | Left-aligned | Left-aligned |
| Body Paragraphs | Left-aligned, no indents | Left-aligned, no indents | First line of each paragraph is indented |
| Closing & Signature | Left-aligned | Right-aligned or centered | Right-aligned or centered |
| Best For | Most standard business correspondence | Thank-you notes, personal business letters, networking follow-ups | Highly conservative industries (law, academia), formal invitations |
As you can see, the differences are subtle but can significantly impact the tone. Choosing the right one shows you've put thought not just into what you're writing, but how you're presenting it.
Using Advanced Word Features to Save Time
Once you've got the basics of a business letter down in Word, you can start using some of the program's smarter features. This is where you can save a ton of time, especially if you find yourself writing professional letters on a regular basis.
Instead of setting up your margins, fonts, and spacing from scratch every time, you can get Word to do the heavy lifting for you.
Create Your Own Custom Word Template
Think of a template as your personal blueprint for any future letter. Once you get a document looking exactly how you want it—perfect margins, the right font, and your contact info already typed out—you can save that layout as a reusable file. It's a game-changer.
Here’s how easy it is to do:
- Get it perfect: Open a new document and set everything up—margins, font, spacing, your letterhead, all of it.
- Save it as a template: Go to File > Save As. When the save dialog box pops up, choose Word Template (.dotx) from the file type dropdown menu.
- Give it a memorable name: Call it something obvious, like "My Business Letter Template," and save it.
Now, the next time you need to write a letter, you just open that template. Word will automatically create a brand new, perfectly formatted document for you to start writing in immediately.
Harness the Power of Mail Merge
Mail Merge is one of Word’s most powerful yet overlooked tools. If you ever need to send the same letter to many different people, this feature will become your best friend. It lets you pull in personal details—like names and addresses—from a list, such as an Excel spreadsheet, and plug them right into your letter.
Imagine you need to send a personalized follow-up to 50 different content creators. Instead of spending an hour copying and pasting names, Mail Merge can do the whole job for you in just a couple of minutes. It connects your letter to your recipient list and spits out a unique, personalized document for every single person.
Combine Smart Tools with Polished Writing
Of course, mastering Word's features is only half the battle. The actual words you write are just as important. The goal is to produce a letter that's not only formatted correctly but also sounds clear, professional, and genuinely human.
This is where you can pair Word’s efficiency with smart, ethical writing help. While Word handles the structure, an AI-powered tool can help you polish the message itself. If you're looking to take your writing up a notch, our guide on using an AI text enhancer is packed with practical tips for improving your clarity and tone.
At PureWrite, we believe in combining the best of both worlds. Use a Word template to nail the format, then let our tool help humanize your draft. It’s an unbeatable combination that ensures your letters are impeccable, from the layout right down to the last word. Try PureWrite and see how fast you can refine your next professional letter.
Polishing Your Letter: Common Mistakes and Pro Writing Tips
You can nail the business letter format in Word perfectly, but a stray typo or a clunky sentence can still derail your message. Getting the layout right earns you a first glance; powerful writing is what earns you respect and a response. This final check is all about making sure your content is just as sharp as your formatting.
It's surprising how often tiny formatting mistakes trip people up. These are the kinds of things that might seem small, but they instantly tell the reader you're not paying close attention to detail.
Little Formatting Details That Make a Big Difference
We've seen some of the same simple slip-ups countless times. Here’s what you need to double-check before you hit print or send:
- The Wall of Text: Forgetting that single blank line between paragraphs is a classic mistake. Without it, your letter becomes an intimidating block of text.
- Overly Casual Greetings: Kicking off a formal letter with "Hey John" instead of "Dear Mr. Smith:" immediately tanks the professional tone you're trying to set.
- No Signature Space: This one’s a big deal for printed letters. You must leave three or four blank lines between your closing ("Sincerely,") and your typed name so there is room to sign it.
- Mixed-Up Alignment: When your paragraphs are left-aligned but your closing is centered, it looks messy unless you're deliberately using the Modified Block format.
These aren't just nitpicky rules. They work together to create a clean, professional document that's easy for the reader to digest.
Tips for Sharper, More Effective Writing
Beyond the layout, the actual words you use need to be clear, concise, and professional. The art of formal writing is far from dead. A 2022 survey revealed that emails structured like a formal letter achieve 40% higher open rates and get quicker replies, especially when the subject is important. You can dig deeper into these business writing essentials on bccampus.ca.
To really make your writing pop, get straight to the point. Hunt down and eliminate filler words. Phrases like "really," "just," and "in my opinion" usually add fluff. Cutting them out makes your sentences punchier and your message clearer.
A final, meticulous review is absolutely essential. Your spell-checker is a good first pass, but it's not foolproof. It won't catch a correctly spelled but wrong word (like "your" vs. "you're"), nor will it tell you if your tone sounds a bit off or robotic.
This is where a tool like PureWrite can be your secret weapon for that final quality check. It goes beyond basic grammar to help you refine your tone, boost clarity, and ensure your writing sounds polished and authentic. Paste your draft in and get your content perfected in minutes. Make sure your letter lands with the impact it deserves by trying PureWrite today.
Ready when you are.
Paste your draft, get writing that reads as yours.
No card required.